
The Anatomy Of A Push-Up
Push-ups are one of the most fundamental movements of your body. Even my 8 month old daughter instinctively knows how to push her body up. But for some reason, we devolve into poor push-up performers. We overcompensate for weaker muscles and develop imbalances which usually lead to injury and chronic pain.
But if you’re looking for a great way to improve your strength as well as your posture, then it’s hard to beat a push-up. There is no equipment required. And you can do them anytime and anywhere. So let’s learn about push-ups!
Know Your Muscles Involved in a Push-Up
First the nerdy stuff. But really, it’s wise to know which muscles are involved so you can be certain your body is moving correctly.
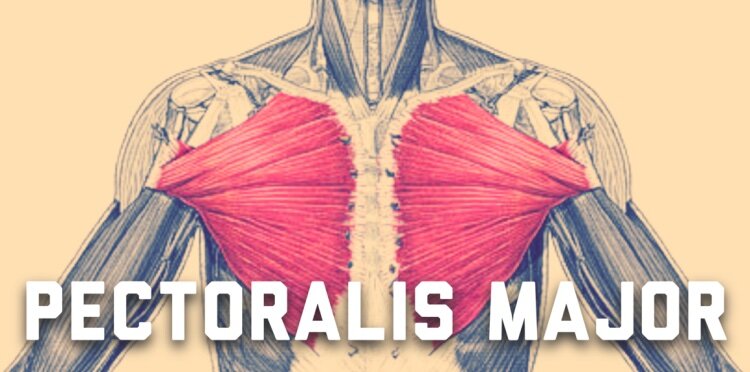
The primary muscle (agonist) for the push-up is the pectoralis major (or pecs). Your pecs are essentially your chest muscles. As you lower yourself toward the floor, your pecs lengthen and control the speed of your descent. As you push back up again, they shorten.
For movement to occur during your push-up, when one muscle contracts, the opposite (antagonist) will relax. This is called reciprocal inhibition. The main antagonist muscles during a push-up are your trapezius, posterior deltoids and rhomboids. These muscles are on the opposite side of the torso in relation to your pecs.
The helper muscles (synergists) used during a push-up are important because they assist the agonist. The main synergists in the push-up are your triceps and anterior deltoids (or front shoulder muscles). They assist with elbow extension and shoulder flexion, respectively.
Stabilizers help hold your body in a certain position so the agonists and sysnergists have a stable base from which to work. Small muscles in your shoulder, called your rotator cuff, keep the head of your humerus firmly located within your shoulder socket while your rectus abdominus, or abs, hold your spine straight. Other stabilizing muscles include your latissimus dorsi (on the side of your upper back) which assists in shoulder stability and your quadriceps (or thigh muscles) which work to keep your legs straight.
How to Get Ready for a Push-Up
Your form is critical. Each push-up needs to be done perfectly so that you don’t overuse secondary muscles and develop muscle imbalances, postural distortions and uncomfortable pain in your shoulders, neck and lower back.
Once you’re on the ground, set your hands slightly wider than shoulder-width apart. You’ll want your hands to be angled in a way that feels comfortable to you. You can also turn your hands slightly inward to create less stress placed on your wrists. Your arms should be straight with your shoulders hovering above your hands supporting your weight.

Your feet should be in a position that feels right and comfortable to you. Typically, the wider distance your feet are from each other, the more stable you’ll be for your push- ups.
Try to imagine a line running from the top of your head down through your heels. Your bottom shouldn’t be sticking way up in the air, nor should your hips be dragging too close to the ground. Your head should be looking slightly ahead of you, not straight down. Looking up will help keep your body in proper alignment.

How to Perform a Push-Up
With your arms straight, bottom clenched, and abs tight, steadily lower your body until your elbows reach a 90 degree angle.
Once your arms lower to 90 degrees, pause slightly and then push back up until you arrive back to your starting position.
Modified Push-Ups
If you are struggling and find yourself saying “I just can’t do a push up!” Then you may need to start with a modified push-up movement, and then progress to more difficult modifications that will eventually result in you doing a real push-up.
Wall Push-Ups
Begin as you would a regular push up, set your hands on a wall slightly wider than shoulder-width apart. Walk backwards with your feet until your arms are fully extended and supporting your weight.Keeping the rest of your body in a straight line, steadily lower yourself towards the wall until your nose almost touches the wall, and then push back up to the starting position.

Incline Push-ups
Incline push-ups are just how they sound. Place your hands on an elevated surface, whether it’s something as tall as a table or as low as a step that is merely inches off the ground.You can begin by doing your elevated push-ups on the stairs in your house. As you get stronger, you can move your hands to lower steps until your hands are on the ground.
